Starting Python Project on Mac


First Things First
You have to install Homebrew and Xcode command-line tools
I installed X-code Directly from Appstore
xcode-select --install# I haven't tested this method but this should also work if you don't like installing from AppstoreTo Install homebrew copy and run a command: https://brew.sh/
Don't forget to add homebrew to the path
Now let's install python
Installing and managing Python can be tricky, so I am going to leave that hassle to a tool pyenv with pyenv we can easily install uninstall and set default Python versions for different versions of Python.
# Hopefully you already have homebrew and xcode-cli-tools setup

brew install pyenv #This will install pyenv
brew install xz # Had to install this to solve lamza unable to build issue when instaling python

#Add Pyenv to path
nano ~/.zshrc
export PATH="$(pyenv root)/shims:$PATH" #Add this line to file

#Pyenv commands
python --version #Check systems default python version
pyenv versions  #Shows version of python available
pyenv install 3.6.7 #This will install python verison 3.6.7
pyenv global 3.6.7 #This will set 3.6.7 as main python

pyenv uninstall 3.6.7 #This will uninstall pyenv
Now set the Python environment
For data science and ML it's better to use Anaconda because it supports both Python and other languages unlike other package managers for other projects we can use Poetry which is convenient and does a lot of things for us.
- I downloaded Anaconda app directly from the website Anaconda Download
#Info : Might have to restart IDE to see newly created virtual environment
python --version

conda config --set auto_activate_base false #true/false value will enable/disable automatic activation of base environment when a new termianl is launched

# ALWAYS START (base) ENVIRONMENT FIRST !!
conda activate base #Starts base environment
conda list #This shows list of all pakages in base environment
conda deactivate #Closes virtual environment move back to terminal

conda env list #This lists all the created env's
conda create --name helloproject python=3.11 #This will create helloproject virtual environment
conda remove --name helloproject --all # removes env and removes all pakages in env
# Newly created Venvs dont have all pakages available in base env
# To get this pakages
conda activate helloproject #activate the env first
conda install scikit-learn #Install package in this env

#Pakages not available in channels
#There is a possibility that the package you are trying to install is not in the channel then you want to connect to a new channel
#(1) If you know which channel the package is available add that channel to our local so that conda can look into that

conda config --show channels #This will list all the channels ie: defaults
conda config --add channels conda-forge #Adds new channel conda-forge
# Flags --add --append --prepend can be used interchangably to change priority
conda config --remove channels conda-forge #Remove channel

conda config --get channels #This will also show priority of channels in order which packages will be looked up for download
conda remove --name helloproject --all #Removes virtual-env all its pakages and channels
Poetry can be used for quick development of projects where we have pure Python projects ie: Projects which does not have data science tools that rely on C or C++ backends. eg: Numpy
See the Poetry install document for more details
The document says poetry should not directly be installed on the system, but rather installed in a virtual environment. This sounds strange but when I think more about it conda does the same, what else conda base environment be?
# to do the setup quick install pipx first, This automatically does virtual environment setup for us
brew install pipx
pipx ensurepath
#Now Poetry stuff
pipx install poetry

# (Change default setting)
poetry config virtualenvs.in-project true #This will create venvs within the project true/false

#If you are creating a new project
poetry new hello_poetry #This will create a new project with necessary project structure

#For existing project
poetry init #create `pyproject.toml` in your folder

poetry env info #Gives information about virtual environment

poetry install #This will create virtualenvs install dependency
#ToDelete venv delete .venv folder

poetry shell #start venv in current terminal

# Adding new pakages
poetry add requests #Installs requests package
poetry add pytest --group dev #to install package to dev group
poetry remove requests #Uninstalls requests package

exit #Exit shell without deactivating
deactivate #Deactivate virtual environment

poetry env list #List all the active virtual environmnt
Visual Studio code and Pycharm auto-detect poetry virtual environment so no additional steps are needed to start working on the project.
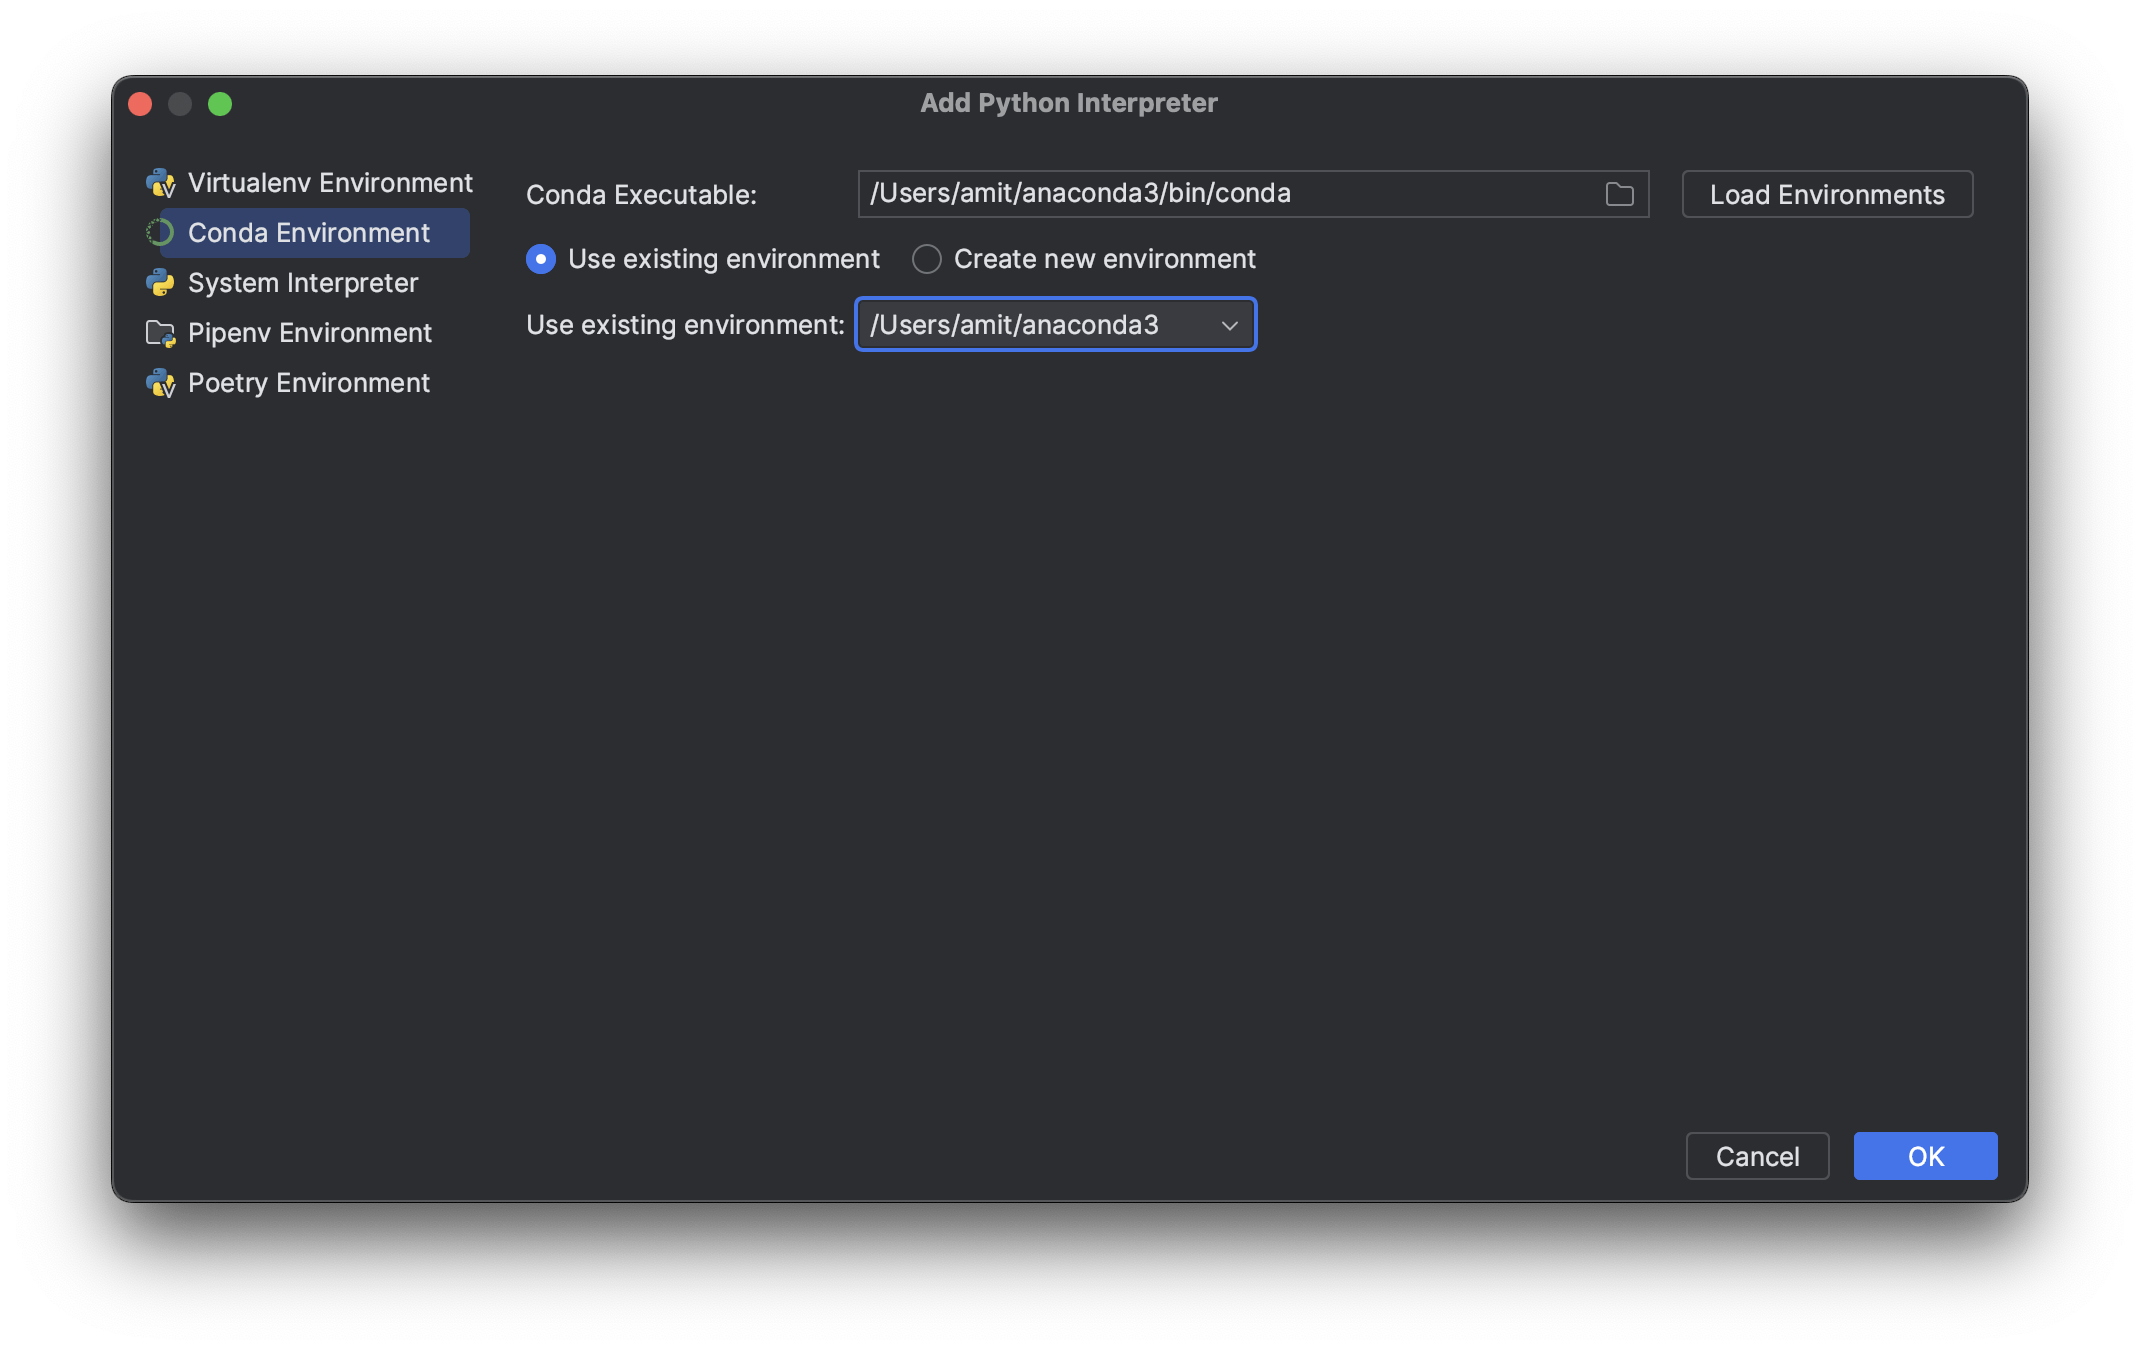
Setting up Anaconda in Pycharm
Navigate to :
pycharm> settings > projects > python Interpreter
Select Conda Environment and configure the following settings
When selecting the existing environment select the dropdown to search for your environment
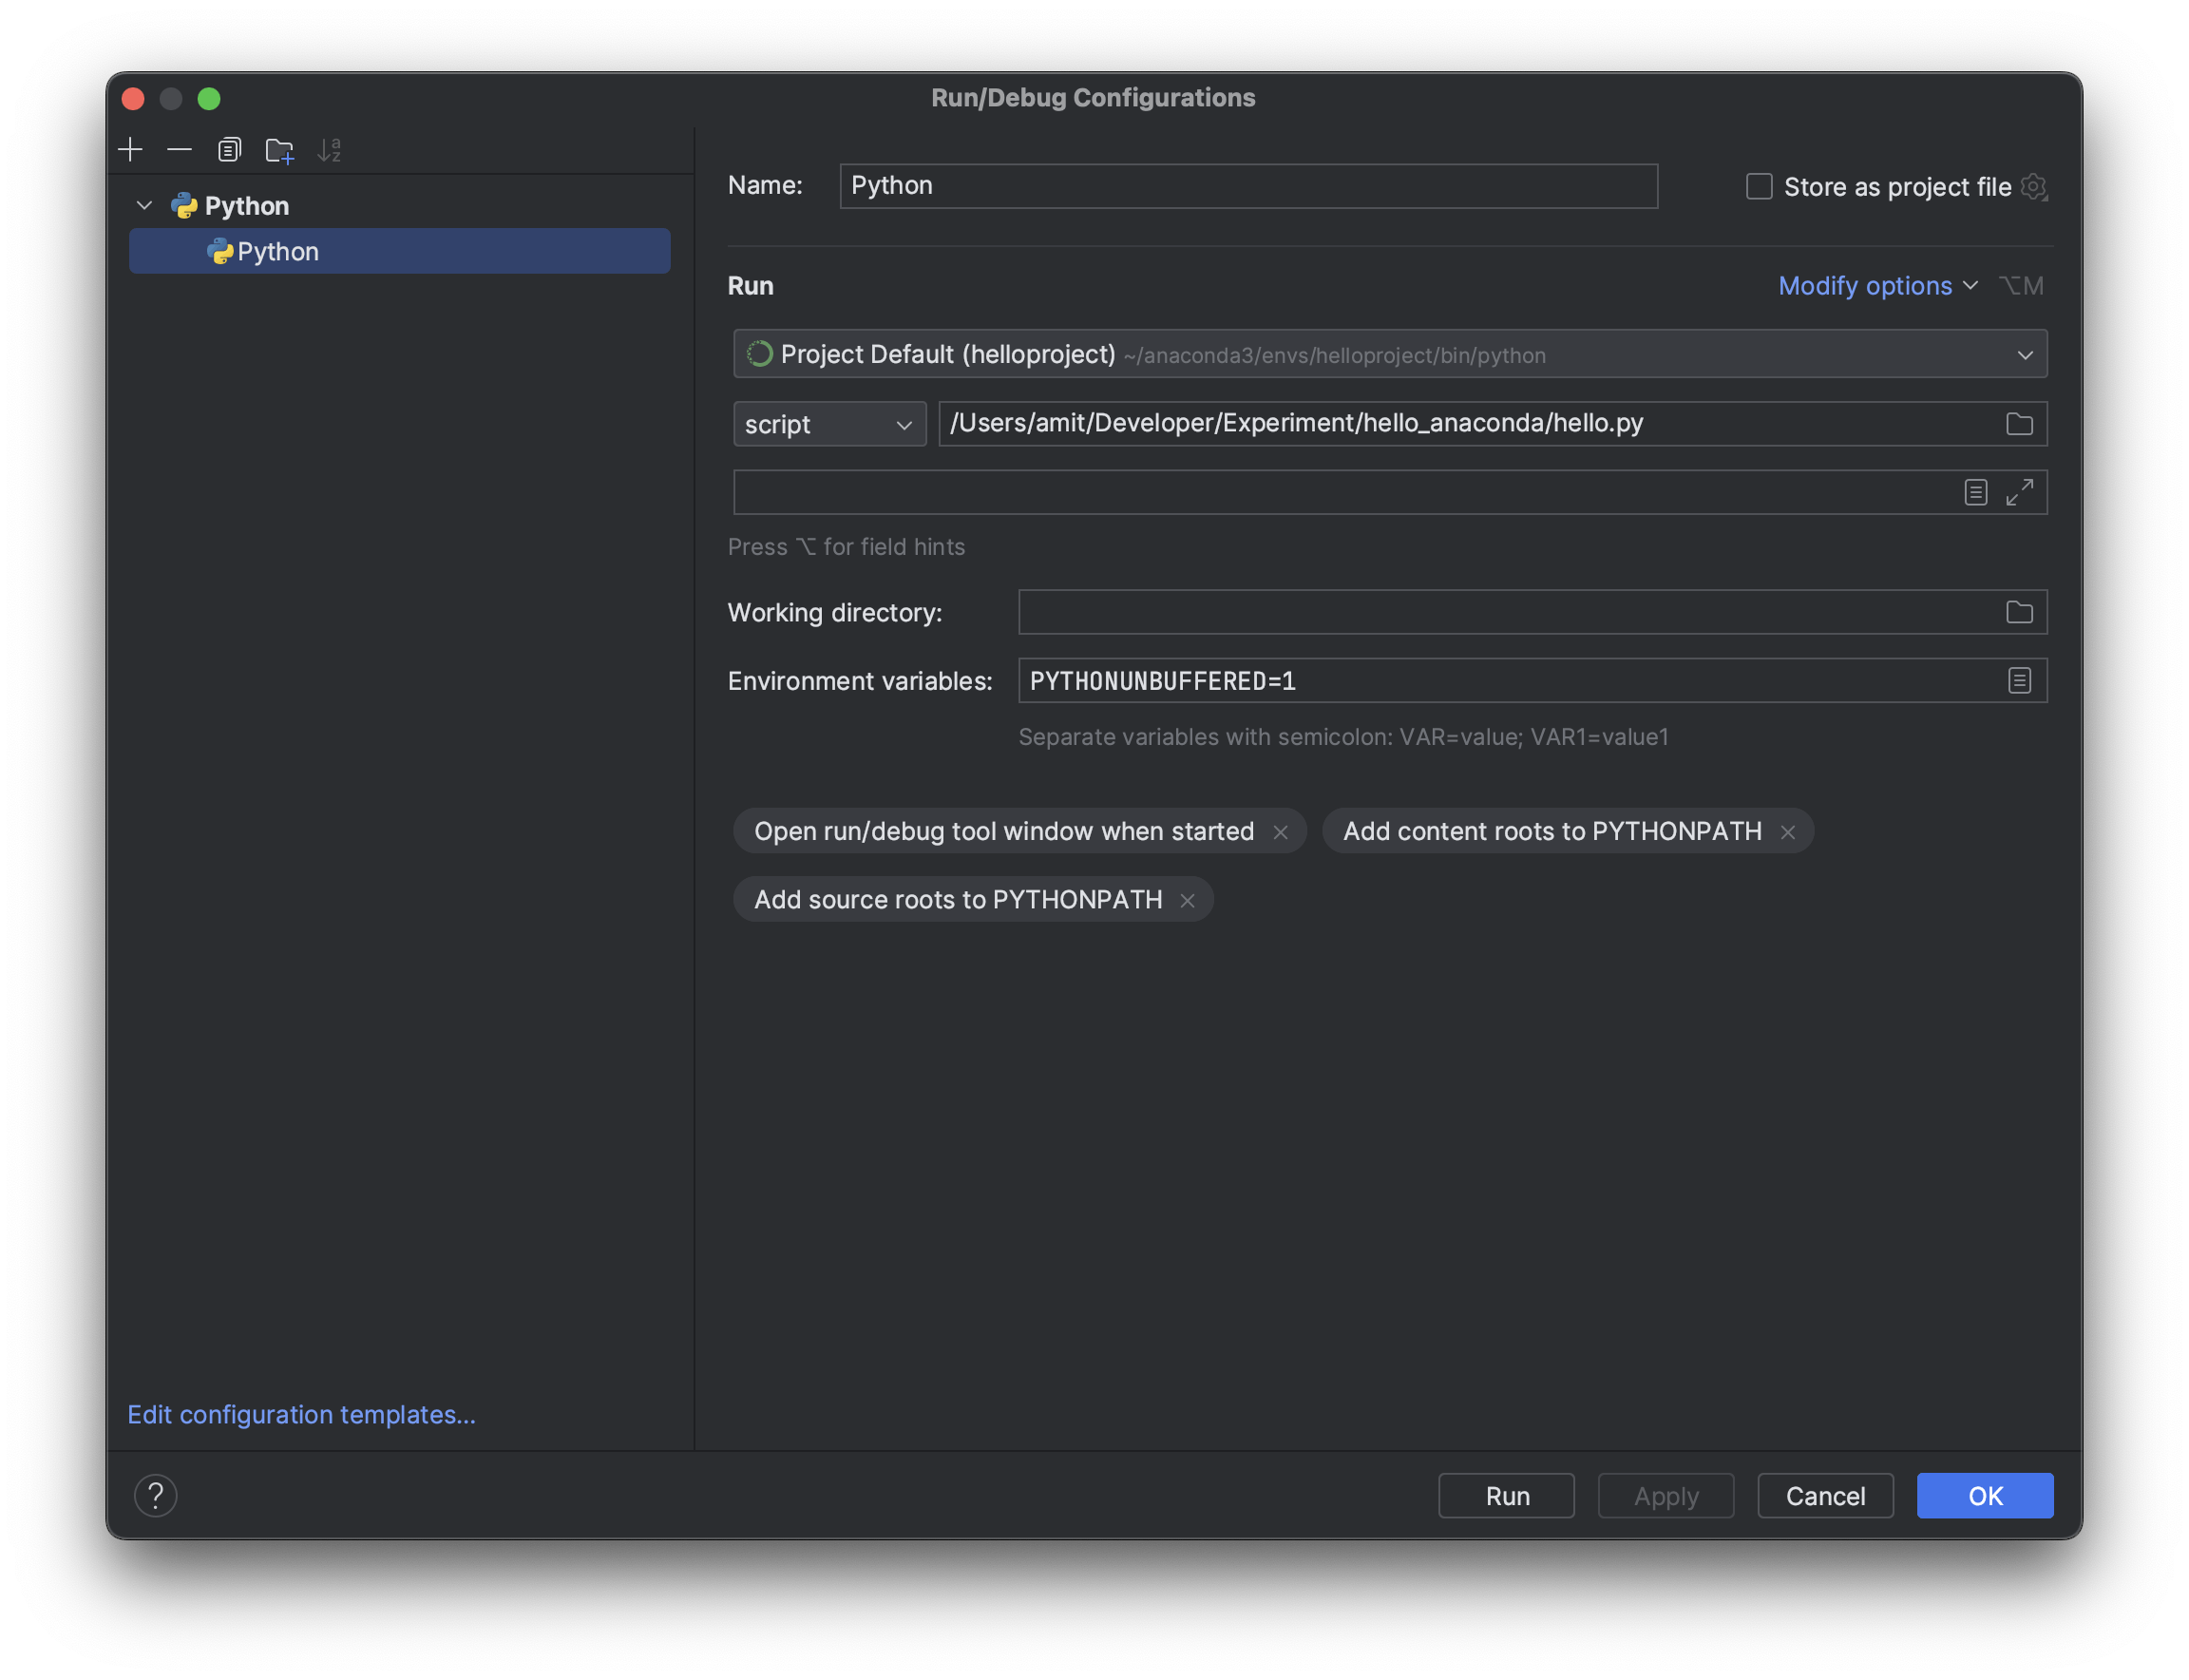
Once the Interpreter is added select the Interpreter in Run debug
script : when you want a single file executed
module : when configuring for entire module
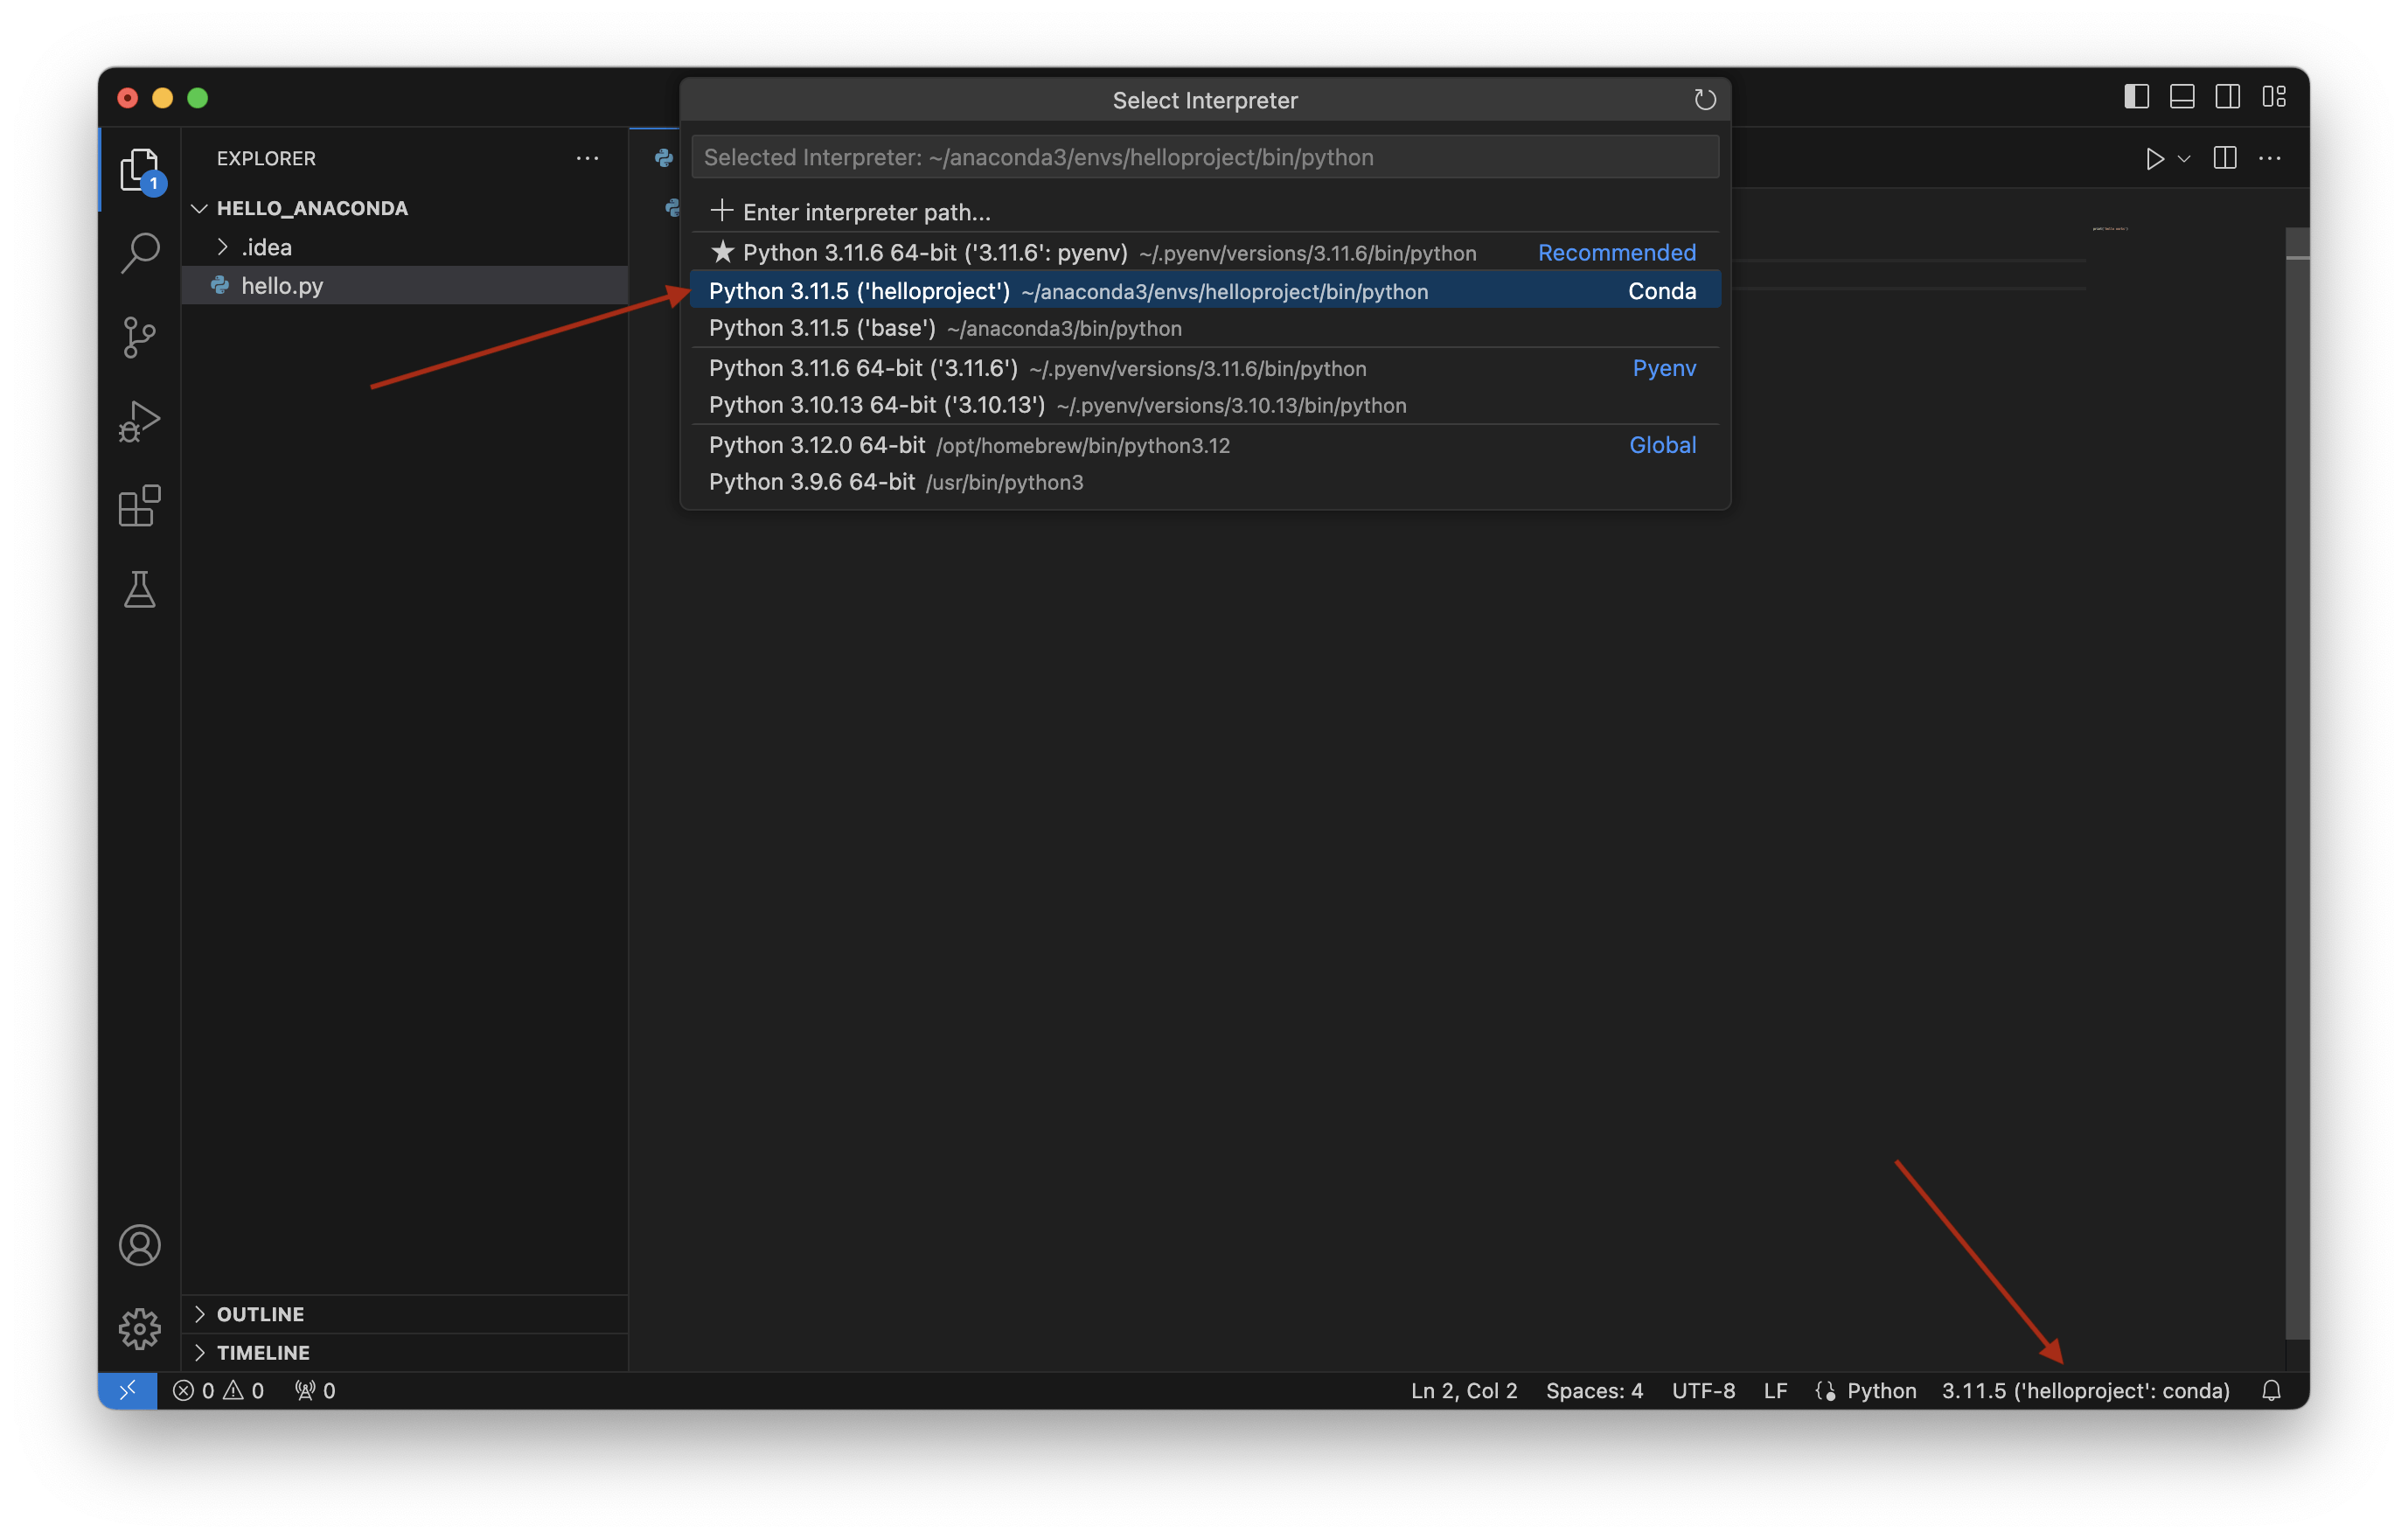
Setting up Anaconda in Visual Studio
The first step is to make sure you have the Python plugin installed on VS Code

Once Plugin and Anaconda are installed
Click on the bottom of the IDE to select what interpreter has to be run.
From the dropdown select your desired environment
I hope you found this helpful, Let me know If there's something I can add to this!